


Documentation

DOCUMENTATION
1.1 Overview and Product Philosophy
Dokan Conditional Category Attributes is an enterprise-grade WordPress plugin engineered specifically for WooCommerce marketplaces powered by the Dokan multi-vendor framework. At its core, the plugin resolves a critical user-experience and data-integrity challenge that native WooCommerce and Dokan installations face: the uncontrolled proliferation of product attributes across vendor dashboards.
In standard configurations, when vendors create or edit products, they are presented with every global attribute defined in the WooCommerce catalog—regardless of whether those attributes are relevant to the product category they have selected. This creates cognitive overload for vendors, increases the likelihood of incorrect product data entry, and degrades the overall taxonomy consistency of the marketplace catalog.
This plugin introduces a sophisticated attribute-gating mechanism that binds WooCommerce global attributes to specific product categories at the administrative level. Once an administrator configures which attributes are permissible for a given category, vendors operating within the Dokan frontend dashboard will only see and interact with those pre-approved attributes when their product selections match the configured categories.
The system supports full hierarchical inheritance, meaning that child categories can either define their own attribute sets or inherit permitted attributes from parent categories, thereby reducing redundant administrative work while maintaining granular control where necessary.
The plugin operates across three distinct architectural layers: the administrative layer (WordPress backend category management), the vendor layer (Dokan frontend product creation and editing interfaces), and the presentation layer (frontend WooCommerce category pages where attribute filters are displayed to customers). Each layer is synchronized through a centralized configuration schema stored in WordPress native options and term metadata tables, ensuring that changes propagate immediately without requiring manual cache clears or vendor retraining.
This documentation page provides exhaustive guidance on installing, configuring, and optimizing the plugin for production marketplace environments. It covers every user-facing interface, every programmatic hook, and every edge case that administrators and developers are likely to encounter during deployment.
1.2 Installation and Environment Preparation
Before initiating installation, verify that your hosting environment meets the baseline requirements for version 3.2. The plugin requires PHP 7.4 or higher, WordPress 5.8 or higher, WooCommerce 5.0 or higher, and Dokan Lite or Pro 3.0 or higher. While the plugin will activate on systems running older versions, critical JavaScript dependencies and REST API endpoints may behave unpredictably below these thresholds.
The plugin is distributed as a standard WordPress plugin archive.
Navigate to your WordPress administrative dashboard, select Plugins > Add New, then upload the
.zip file containing the plugin. Upon activation, the system will automatically generate a unique cryptographic option key derived from your site URL and a static salt. This key is used to store and retrieve your license configuration securely within the WordPress options table.Do not attempt to manually modify this option key or the associated database entries, as the license validation system depends on the integrity of this hash.
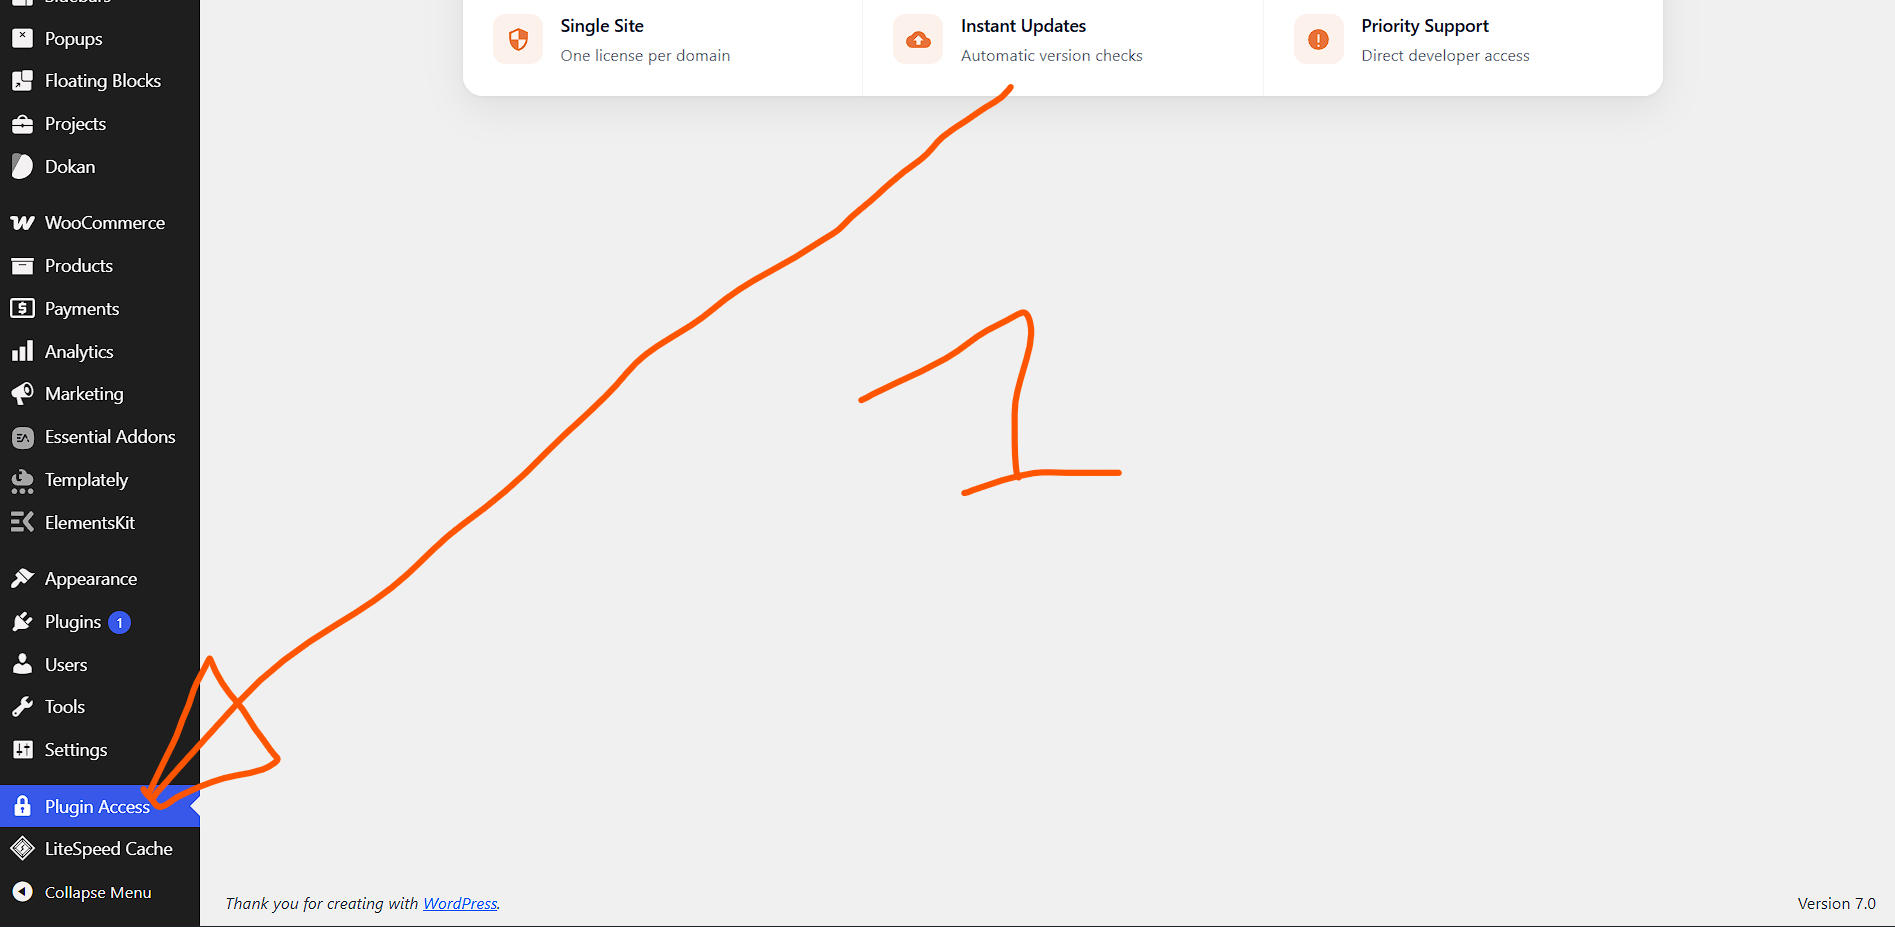
Upon first activation, the plugin registers a top-level administrative menu item labeled Attribute Gate under the main WordPress admin sidebar. This interface serves as the central license management console and is the first screen you should visit after installation.
1.3 License Activation and Initial Configuration
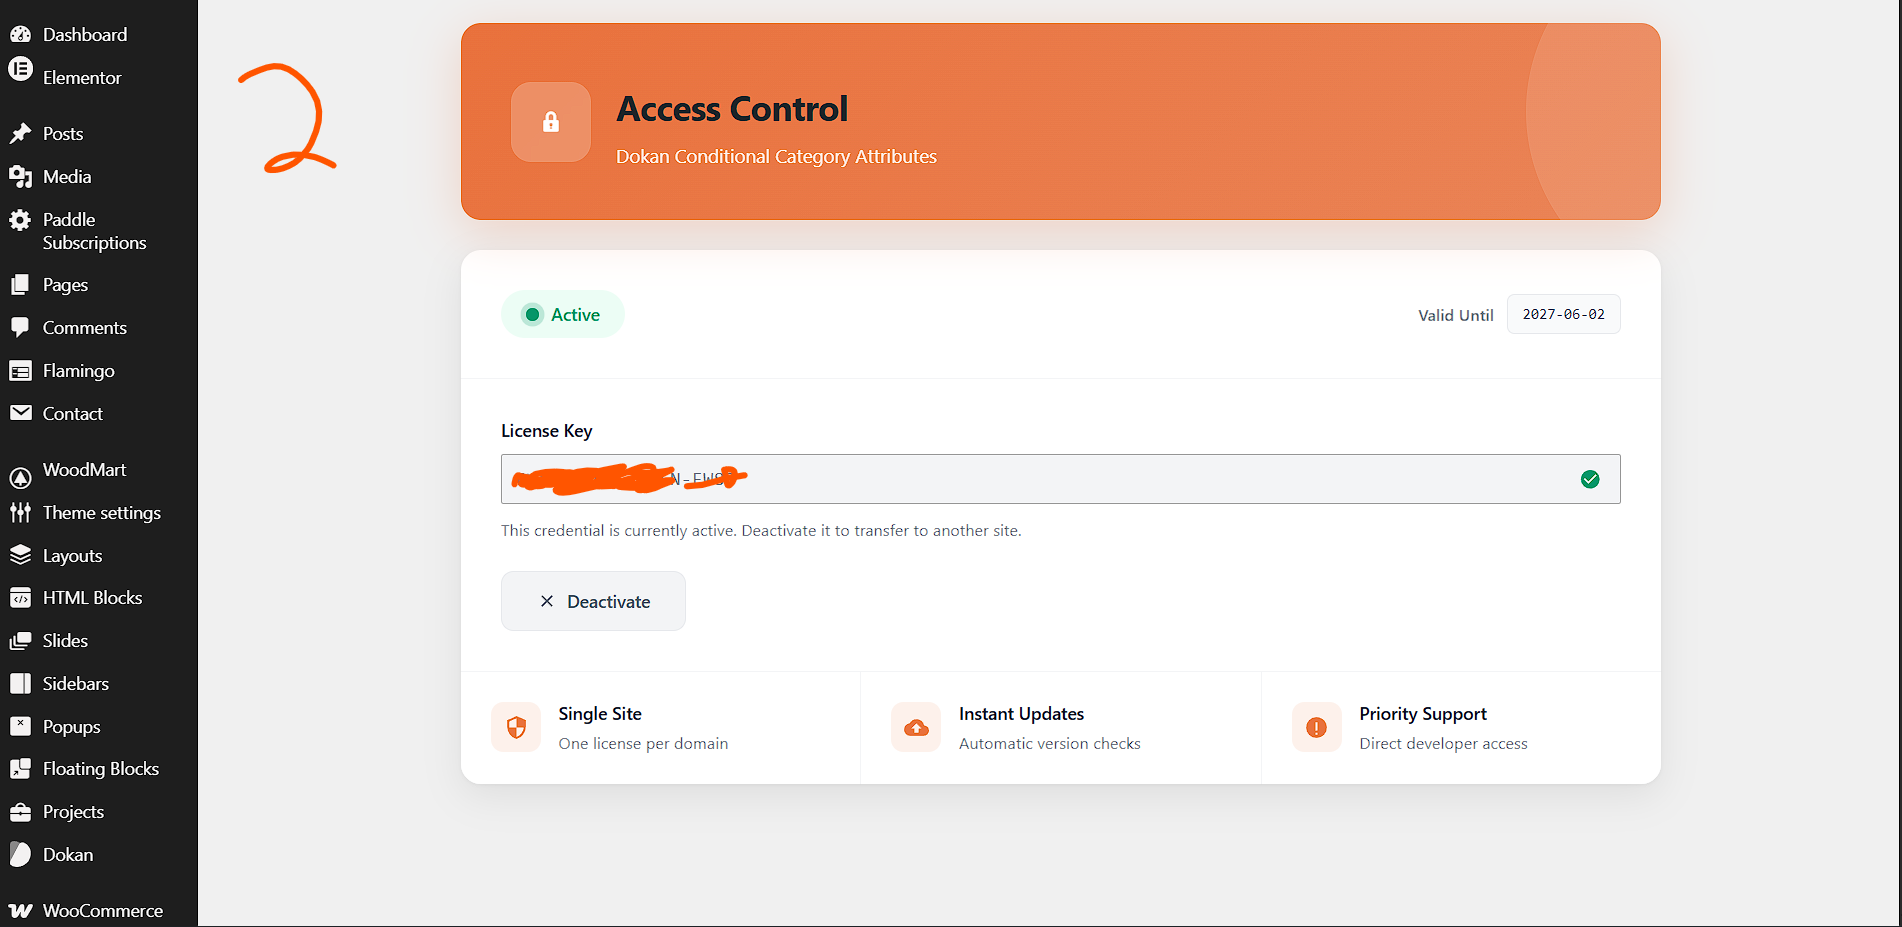
The plugin employs a domain-bound license system to ensure compliance with commercial usage terms. After activation, navigate to Attribute Gate in the admin sidebar. You will be presented with a clean, modern interface featuring a status badge, a license key input field, and contextual action buttons. The interface uses a responsive card-based layout with a branded header gradient, ensuring that the licensing experience feels native to contemporary WordPress administrative design language.
If you possess a valid license key, enter it into the License Key field and click Activate License. The system will transmit an activation request to the remote licensing server, including your domain name, license key, and a product identifier. Upon successful validation, the server returns an activation token and expiration timestamp, both of which are encrypted and stored locally. The status badge will transition from red (Inactive) to green (Active) with a subtle pulsing animation on the status dot. If activation fails, an inline notice will appear with a precise error message—common failures include invalid keys, domain mismatches, or expired licenses.
For administrators managing multiple environments, note that each license key is typically bound to a single production domain. Staging and development subdomains may require separate keys or fall under a developer-tier license agreement. The plugin strips the
www. prefix from domains during validation to prevent trivial mismatches, but root domain consistency is strictly enforced.Once activated, the plugin unlocks all administrative features. Until activation is complete, the attribute filtering logic will remain dormant, and vendors will see the default unfiltered attribute list in their Dokan dashboards.
1.4 Category Attribute Mapping Configuration
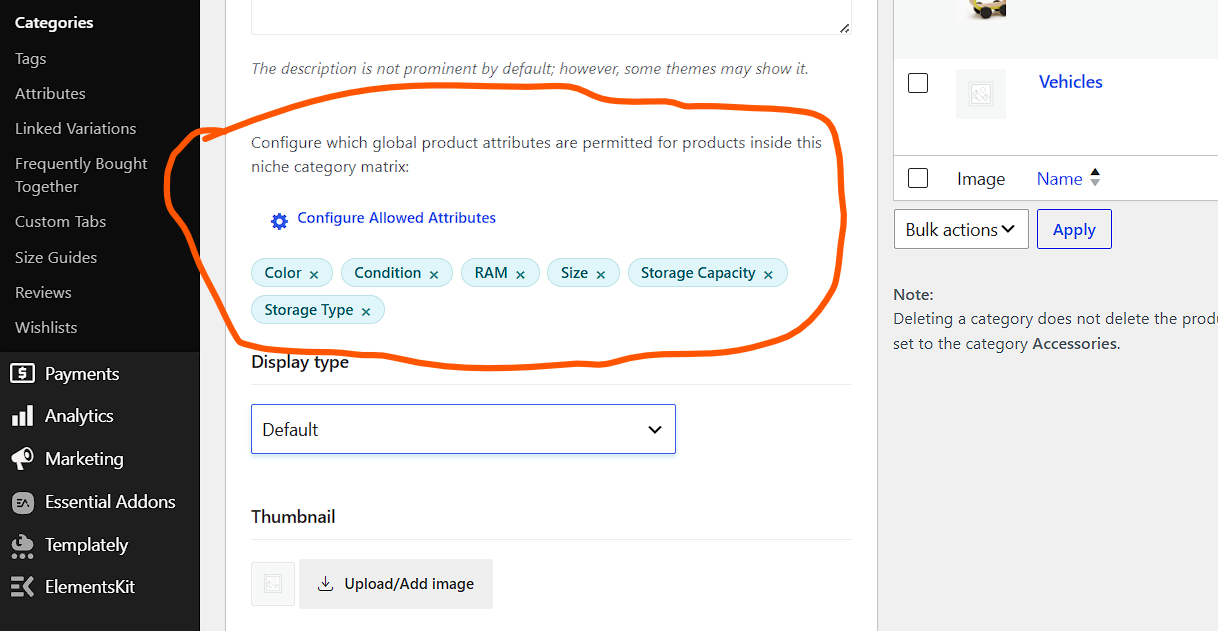
The primary functional configuration occurs within the standard WordPress product category management interface. Navigate to Products > Categories and either create a new category or edit an existing one. Below the standard category fields—name, slug, parent, description, and thumbnail—you will find a new meta box titled Allowed Attributes for this Category.
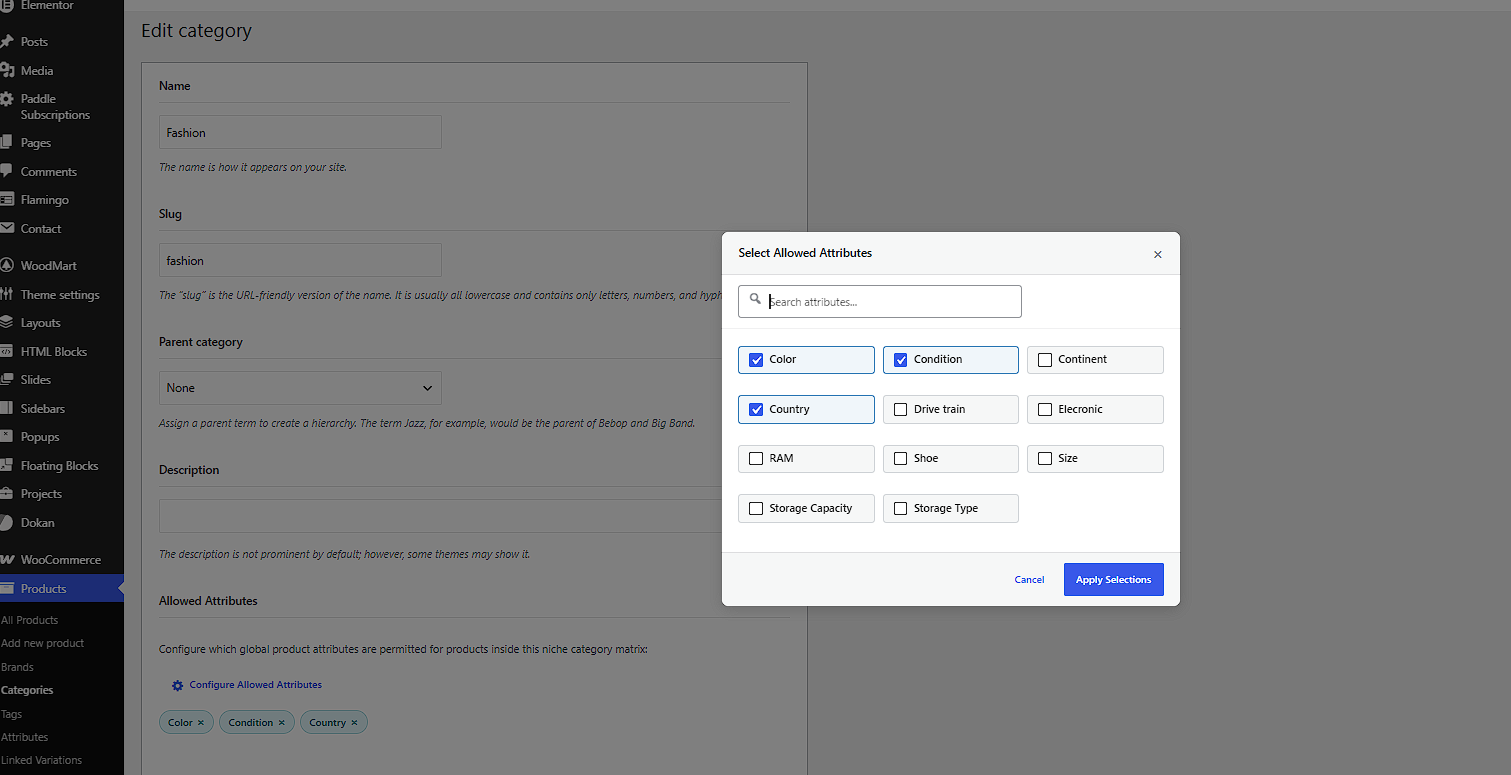
This meta box contains a button labeled Configure Attributes accompanied by a descriptive paragraph explaining that the selected attributes will determine which fields appear for vendors when they categorize products under this term. Clicking the button opens a modal dialog window. The modal is built with a responsive grid layout, presenting all globally defined WooCommerce product attributes as selectable tiles. Each tile displays the attribute label (e.g., “Color”, “Size”, “Material”) alongside a checkbox. Selected tiles receive a visual highlight state with a blue border and tinted background.
The modal includes a real-time search input at the top. As you type, the grid dynamically filters to show only attributes whose labels contain the search string. This is essential for marketplaces with extensive attribute schemas—some enterprise catalogs may have fifty or more global attributes, and the search functionality prevents administrators from scrolling through unwieldy lists.
Select the attributes relevant to the category. For example, if you are configuring a “Men’s T-Shirts” category, you might select “Size”, “Color”, “Material”, and “Fit Type”. If you are configuring a “Digital Downloads” category, you might select “File Format”, “License Type”, and “Compatibility”. After making your selections, click Save Selections. The modal will close and the selected attributes will appear as removable “chips” or tags below the configuration button. Each chip displays the attribute label with a small “×” icon that allows rapid removal without reopening the modal.
If no attributes are selected, the chip area will display a placeholder message indicating that no restrictions are applied—in this state, vendors will see all global attributes, effectively bypassing the plugin’s filtering for this category.
1.5 Hierarchical Category Inheritance
One of the most powerful features of the plugin is its intelligent inheritance system. When you define allowed attributes on a parent category, child categories automatically inherit those permissions unless they explicitly define their own attribute set. This is particularly valuable for large taxonomies. Consider a fashion marketplace with the following hierarchy:
-
Apparel (Parent)
-
Men’s Clothing (Child)
-
Men’s Shirts (Grandchild)
-
Men’s Pants (Grandchild)
-
-
Women’s Clothing (Child)
-
Women’s Dresses (Grandchild)
-
-
If you assign “Size”, “Color”, and “Material” to Apparel, then Men’s Clothing, Men’s Shirts, Men’s Pants, Women’s Clothing, and Women’s Dresses will all inherit those three attributes by default. However, if you edit Men’s Shirts and explicitly assign “Size”, “Color”, “Material”, “Fit Type”, and “Sleeve Length”, then the grandchild category will use its own five-attribute set, overriding the parent’s three-attribute set. This override is stored in the child category’s term metadata and takes precedence during the resolution algorithm.
The inheritance lookup traverses upward until it finds a category with a non-empty attribute configuration. If no ancestor has a configuration, the plugin returns an empty restriction set, which the system interprets as “show all attributes” to prevent accidental data lockout.
Administrators should be mindful of inheritance depth. While the system is optimized for performance, categories nested more than ten levels deep may introduce marginal latency during attribute resolution on shared hosting environments. For most commercial taxonomies, this is never a practical concern.
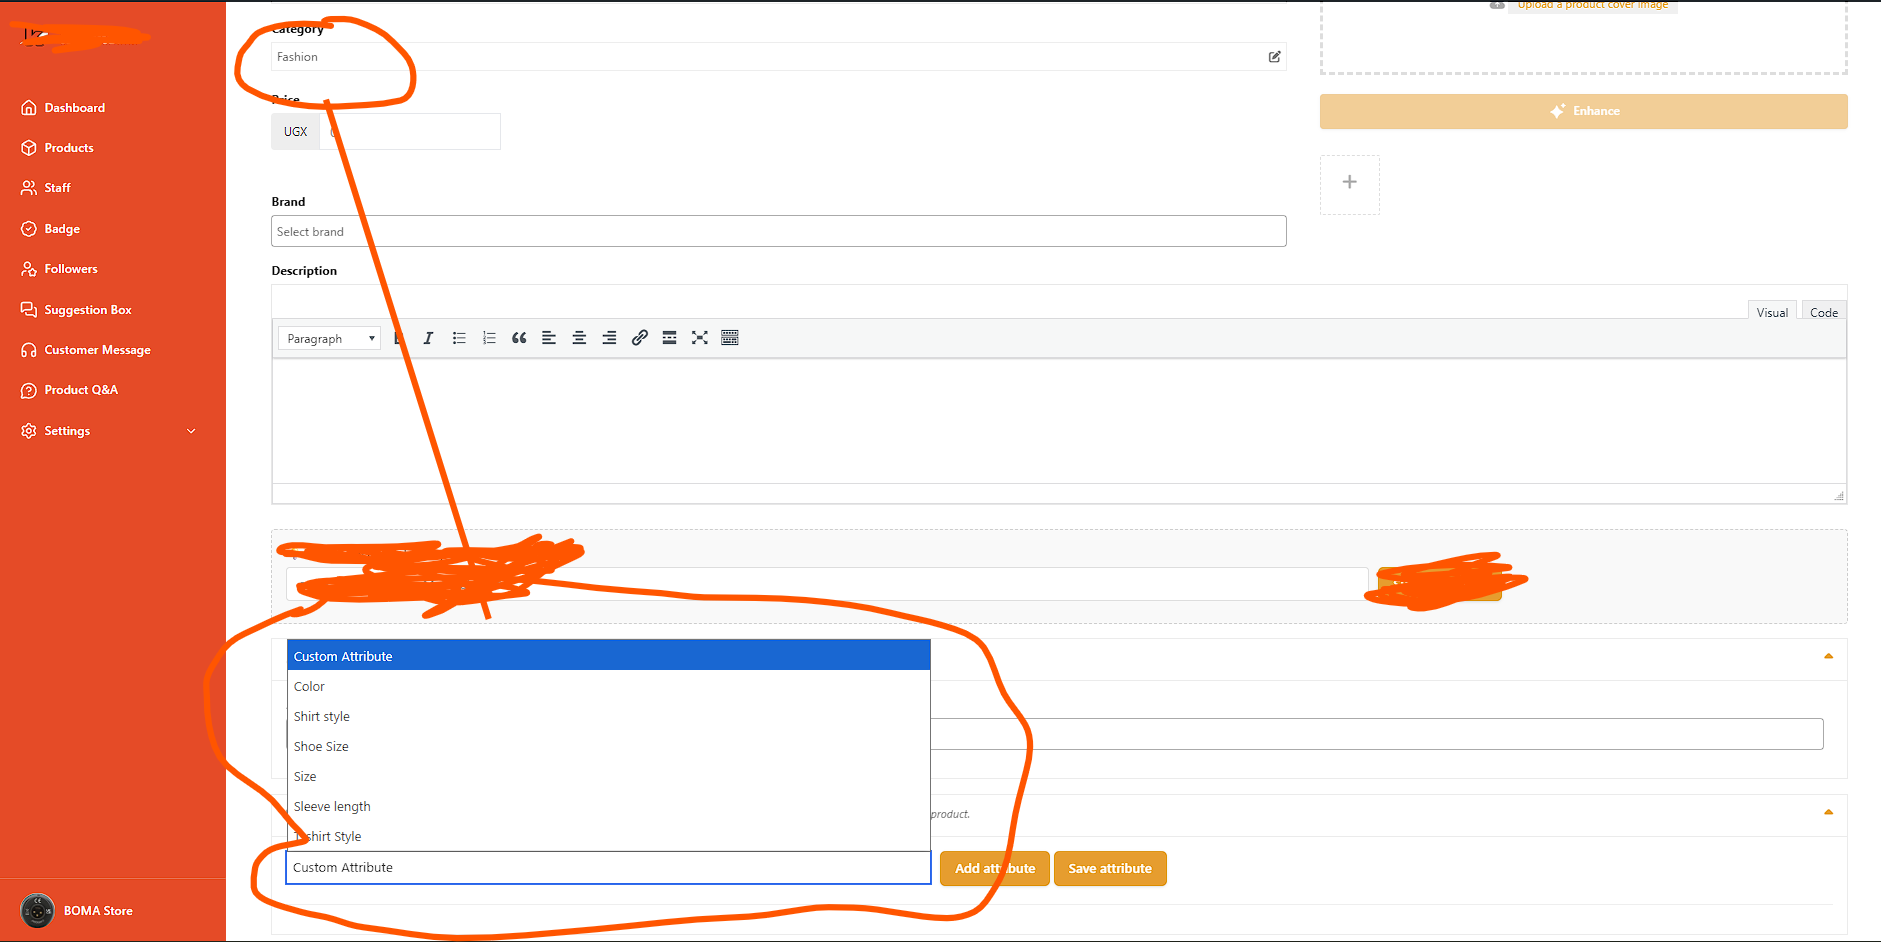
1.6 Dokan Vendor Dashboard Integration
The vendor-facing integration is entirely transparent and requires no configuration beyond the administrative category mapping described above. When a vendor navigates to their Dokan dashboard and opens the product creation or editing interface, the plugin injects a specialized JavaScript module into the page footer. This module listens for category selection events on the Dokan category input holder.
As the vendor selects categories—either through checkboxes, dropdowns, or multi-select interfaces depending on the Dokan theme configuration—the JavaScript compiles a list of selected category IDs. It then cross-references these IDs against the
window.X7M configuration object, which is a JSON-encoded map generated server-side during page load. This map contains every category ID that has explicit or inherited attribute restrictions, paired with an array of permitted attribute slugs.If the vendor selects a category with restrictions, the script dynamically filters the attribute dropdowns. The predefined attribute selector (the
<select> element vendors use to add new attributes) is repopulated in real time to show only the allowed attributes. Furthermore, any attribute rows already added to the product that are no longer permitted by the newly selected category will be automatically removed from the DOM. This prevents vendors from retaining irrelevant attributes after changing a product’s category.The script also handles Select2-enhanced dropdowns, triggering the
change.select2 event to ensure that the visual state of the dropdown remains synchronized with the underlying <option> elements. If the vendor deselects all restricted categories or selects only unrestricted categories, the attribute dropdown reverts to showing the full global attribute list.This integration is compatible with Dokan’s AJAX-powered category selectors and standard form submissions. It does not interfere with custom attributes (those with the value “custom”), which are always permitted because they are vendor-specific and not drawn from the global attribute pool.
1.7 Frontend Category Page Filtering
Beyond the administrative and vendor dashboards, the plugin extends its attribute governance to the frontend of the marketplace. On standard WooCommerce product category archive pages, WooCommerce and many themes display layered navigation widgets or attribute filter dropdowns that allow customers to narrow down product listings. Without this plugin, all attributes associated with any product in that category may appear as filter options, even if they are irrelevant to the majority of items.
When a customer visits a category page, the plugin intercepts the attribute query via the
woocommerce_layered_nav_filters filter hook (and related attribute display hooks). It retrieves the current queried category ID, resolves the allowed attribute set for that category using the same inheritance logic applied in the vendor dashboard, and filters the returned attribute objects accordingly. Consequently, customers only see filter options that the marketplace administrator has deemed relevant to the category.For example, in a “Smartphones” category, customers might see filters for “Brand”, “Operating System”, “Screen Size”, and “Storage Capacity”. They will not see “Shoe Size” or “Fabric Type” filters, even if a miscategorized product exists in the category. This dramatically improves conversion rates by reducing filter noise and ensuring that the faceted navigation experience remains contextually relevant.
The frontend filter operates with a priority of 100 on the relevant WooCommerce hooks, ensuring it executes after most theme and plugin filters but before final rendering. If your theme uses custom attribute display logic, you may need to adjust hook priorities or consult the developer reference section below.
1.8 Product Save-Time Attribute Sanitization
To enforce data integrity at the persistence layer, the plugin hooks into WooCommerce product save events. When a product is saved—whether by an administrator in the backend or a vendor in the Dokan frontend—the plugin inspects the product’s assigned category IDs. It resolves the most restrictive union of allowed attributes across all selected categories. If the product possesses global attributes (those prefixed with
pa_) that are not in the permitted set, those attributes are stripped from the product’s attribute array before the save operation completes.This server-side validation acts as a security and integrity backstop. Even if a vendor circumvents the JavaScript filtering (for example, by manually manipulating the DOM or submitting a crafted POST request), the server will sanitize the data during the
wp_insert_post and WooCommerce product object save cycles. The sanitization routine preserves custom attributes (non-prefixed) and does not affect product taxonomies, tags, or standard metadata.The save-time filter is particularly important for marketplaces that import products via CSV, REST API, or third-party dropshipping integrations. Imported products that violate category attribute constraints will be automatically cleaned during their first save cycle within WordPress.
1.9 Database Schema and Data Storage
The plugin maintains a minimal database footprint, leveraging existing WordPress tables rather than creating custom tables. Three data storage mechanisms are employed:
-
Options Table: Stores the license configuration under a dynamically named option key (
wc_[hash]_attr_cfg). This entry contains the license key, activation state, domain, activation token, and expiration date. The option name is salted to prevent trivial discovery by other plugins or users with database access. -
Term Meta Table: Stores allowed attribute arrays for each product category using the key
_allowed_attributes. The value is a serialized array of attribute slugs (without thepa_prefix). Because WordPress term metadata is indexed, lookups are efficient even with thousands of categories. -
Transient/Cache: The plugin uses a custom transient (
a7f3c9d2e1b4_chk) to throttle background license verification to once per day. This prevents excessive remote API calls and ensures that temporary license server outages do not impact marketplace operations.
No personal data, vendor information, or customer details are stored by the plugin. GDPR and privacy compliance are maintained by design.
-
interruption.