


The Ultimate Setup & Training Guide
Why Attribute Control Changes Everything for Multivendor Marketplaces
Running a multivendor marketplace with Dokan and WooCommerce is powerful—until your vendors start adding inconsistent product attributes. One vendor lists “Color” as “Red,” another writes “RD,” and a third uses “Crimson.” Before long, your filter widgets break, your search results become messy, and customers bounce.
Dokan Conditional Category Attributes plugin solves. By restricting which WooCommerce product attributes appear based on the selected product category, you enforce data consistency, simplify the vendor experience, and keep your frontend filters working perfectly.
In this complete guide, we’ll walk through everything: licensing activation, category configuration, vendor dashboard behavior, frontend filtering, and advanced inheritance strategies. Whether you’re a marketplace admin setting this up for the first time or a developer customizing the workflow, this guide has you covered.
What This Plugin Does (And Why It Matters)
Before we dive into setup, let’s clarify the core value proposition. The Dokan Conditional Category Attributes plugin creates a direct relationship between product categories and product attributes in WooCommerce.
Core Features at a Glance
-
Category-Based Attribute Restriction: Assign specific WooCommerce attributes to specific product categories. When a vendor selects “T-Shirts,” only “Color,” “Size,” and “Material” appear—not “Battery Life” or “Storage Capacity.”
-
Dokan Vendor Dashboard Integration: The plugin restrict directly into the Dokan seller dashboard. As vendors select categories, the attribute dropdown dynamically updates in real-time without page reloads.
-
Frontend Filter Compatibility: The plugin doesn’t just clean up the backend. It also filters attribute taxonomies on product category pages, ensuring customers only see relevant filter options.
-
Parent Category Inheritance: If you configure attributes for “Clothing,” child categories like “T-Shirts” and “Jeans” automatically inherit those allowed attributes unless overridden specifically.
-
License Management: Built-in activation gate with expiry tracking, renewal warnings, and domain binding for legitimate usage.
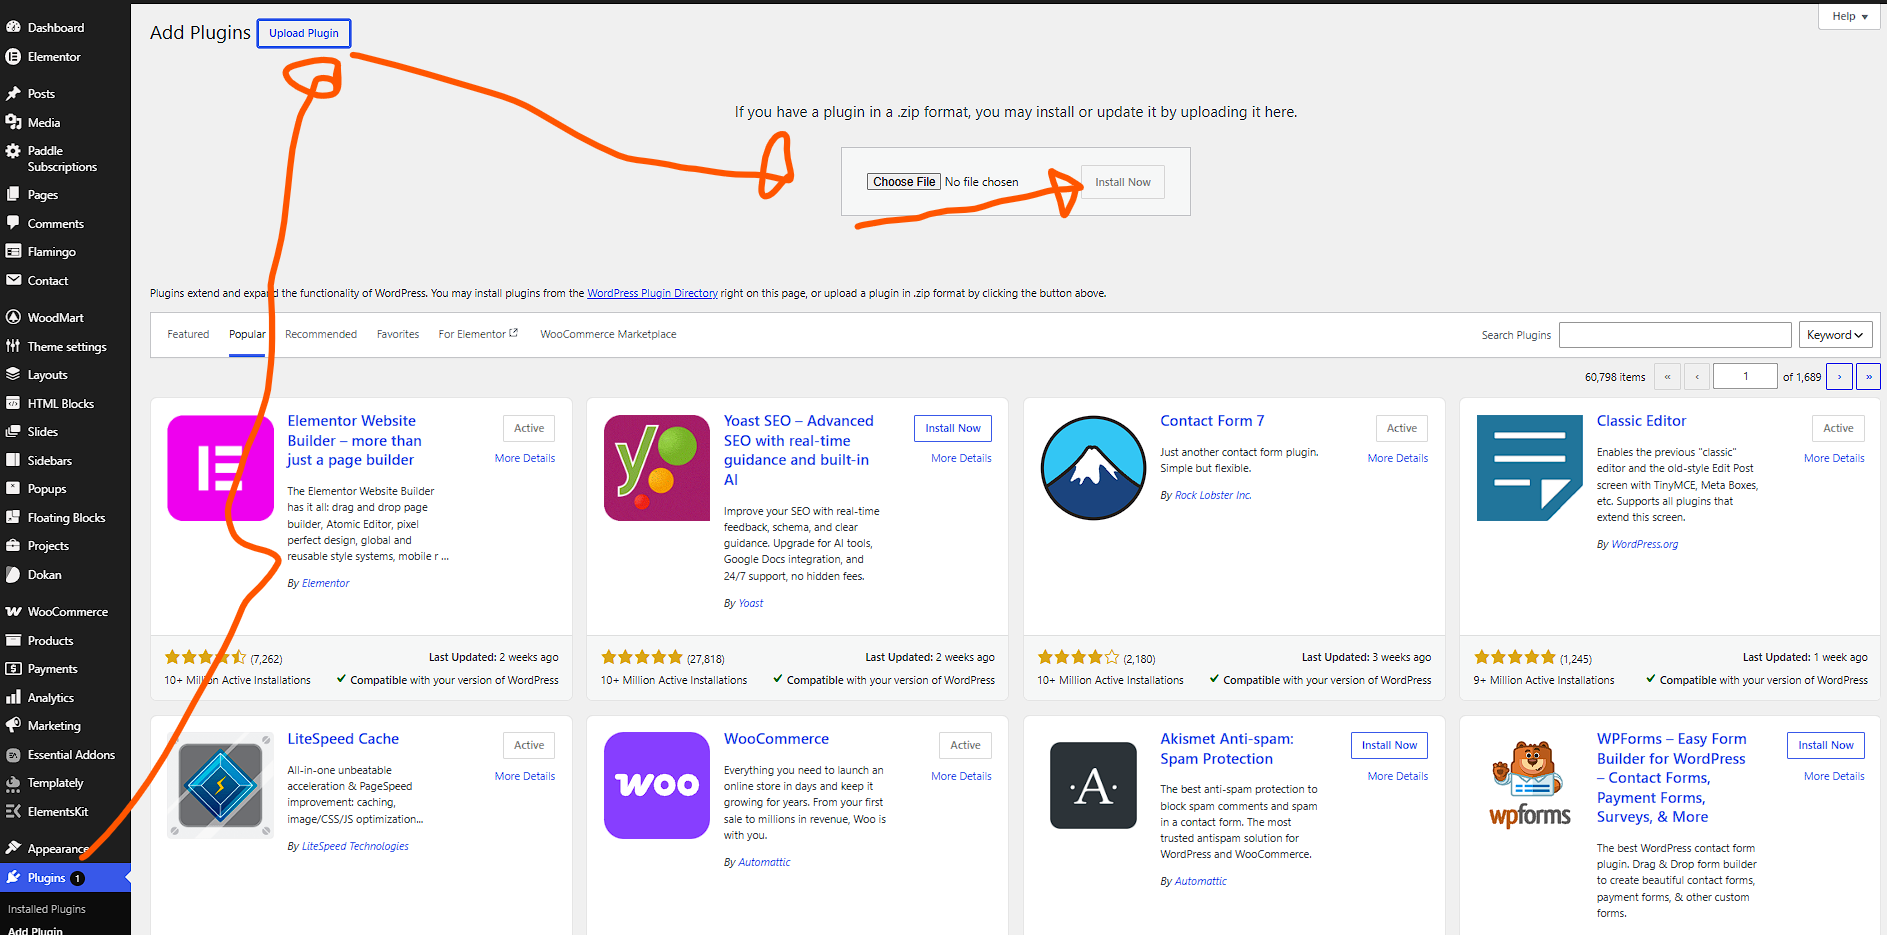
Step 1: Installation and License Activation
Uploading the Plugin
Like most premium WordPress plugins, installation begins in your WordPress admin:
-
Navigate to Plugins → Add New → Upload Plugin
-
Choose the plugin ZIP file provided by the developer
-
Click Install Now, then Activate
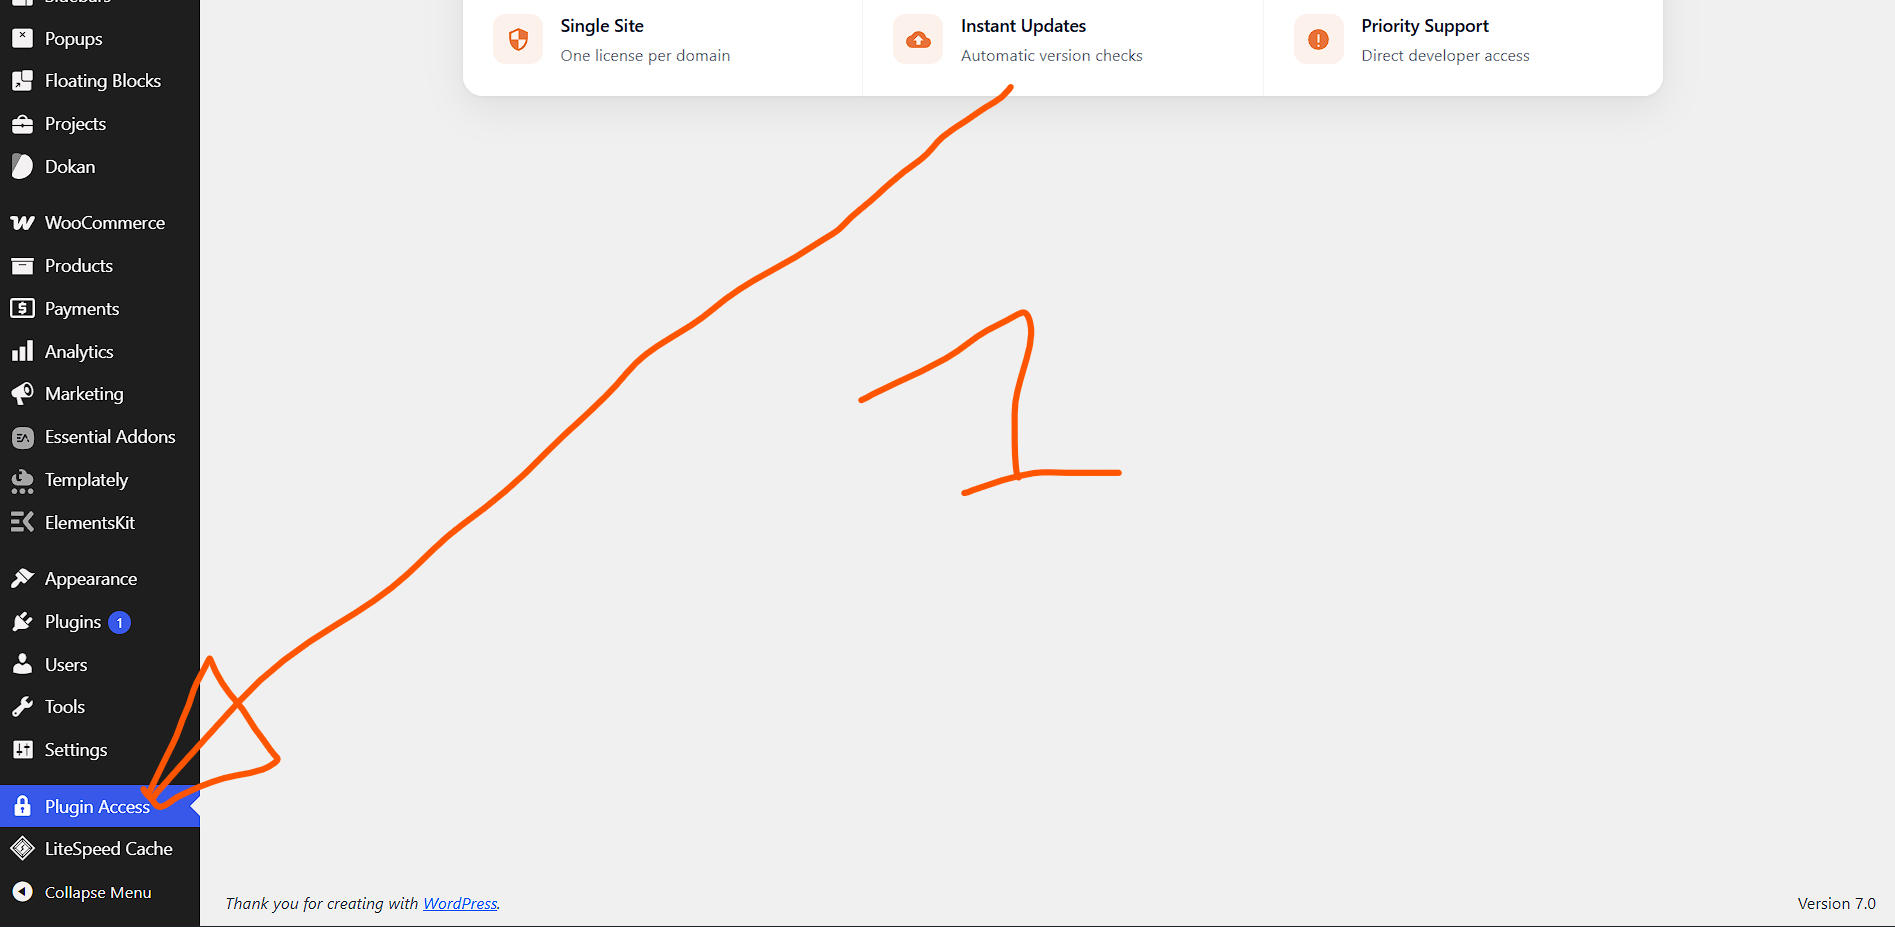
Navigating the License Gate
Once activated, the plugin adds a new menu item in your WordPress admin sidebar. Clicking it reveals the License Activation Gate—a beautifully designed interface with status indicators, secure key input, and feature highlights.
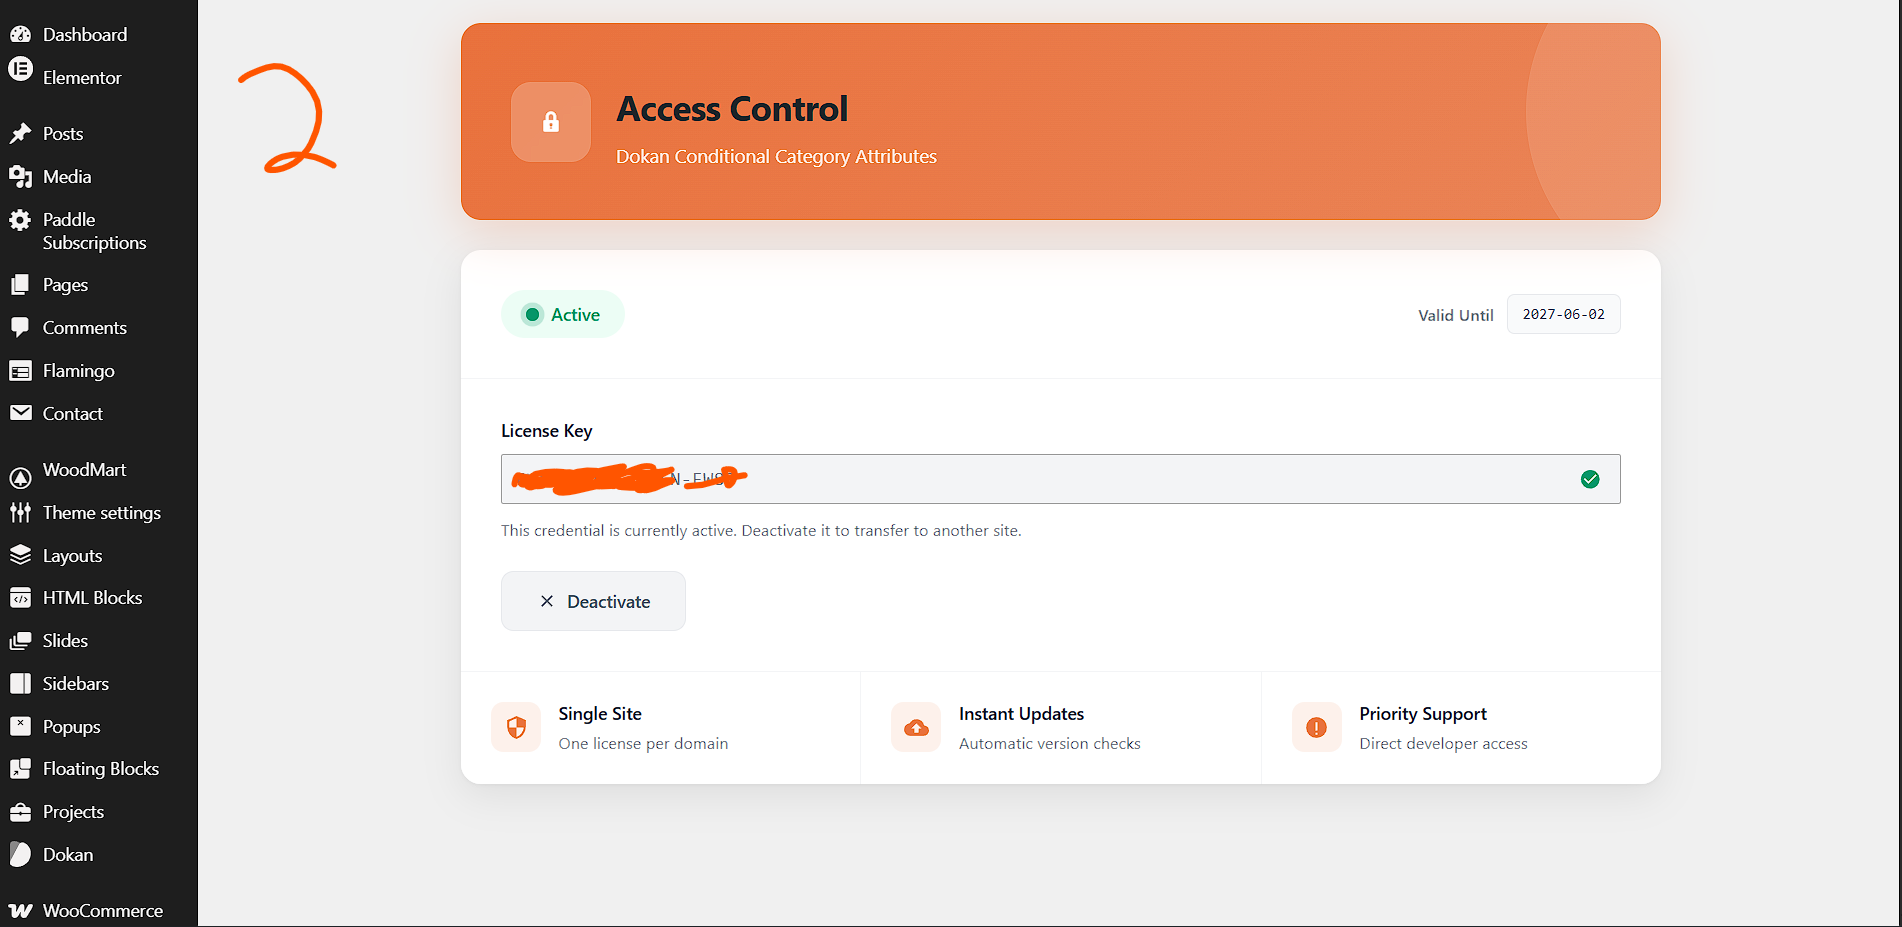
Activating Your License Key
-
Locate your license key from the purchase confirmation email
-
Enter it in the License Key field (format typically looks like
XXXX-XXXX-XXXX-XXXX) -
Click Activate License
-
The status badge will switch from red “Inactive” to green “Active” with a pulsing animation
Important: The plugin binds to your domain. If you migrate sites or change domains, you’ll need to deactivate and reactivate. The system also tracks expiry dates and shows renewal warnings 30 days before expiration.
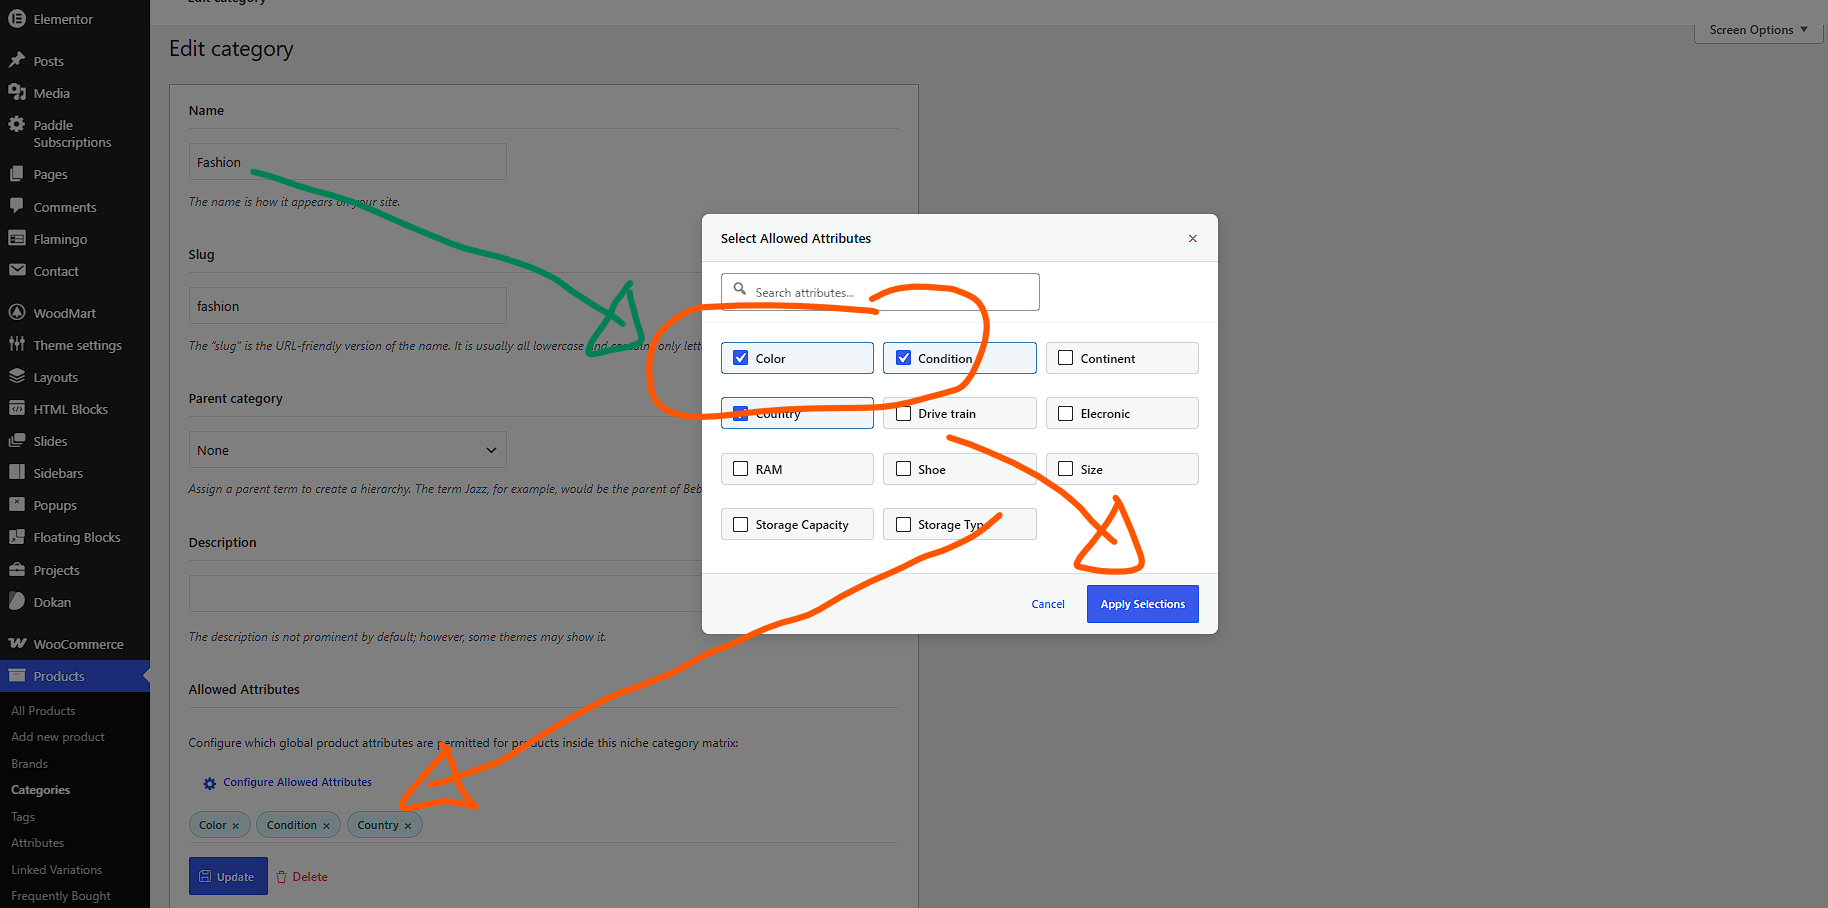
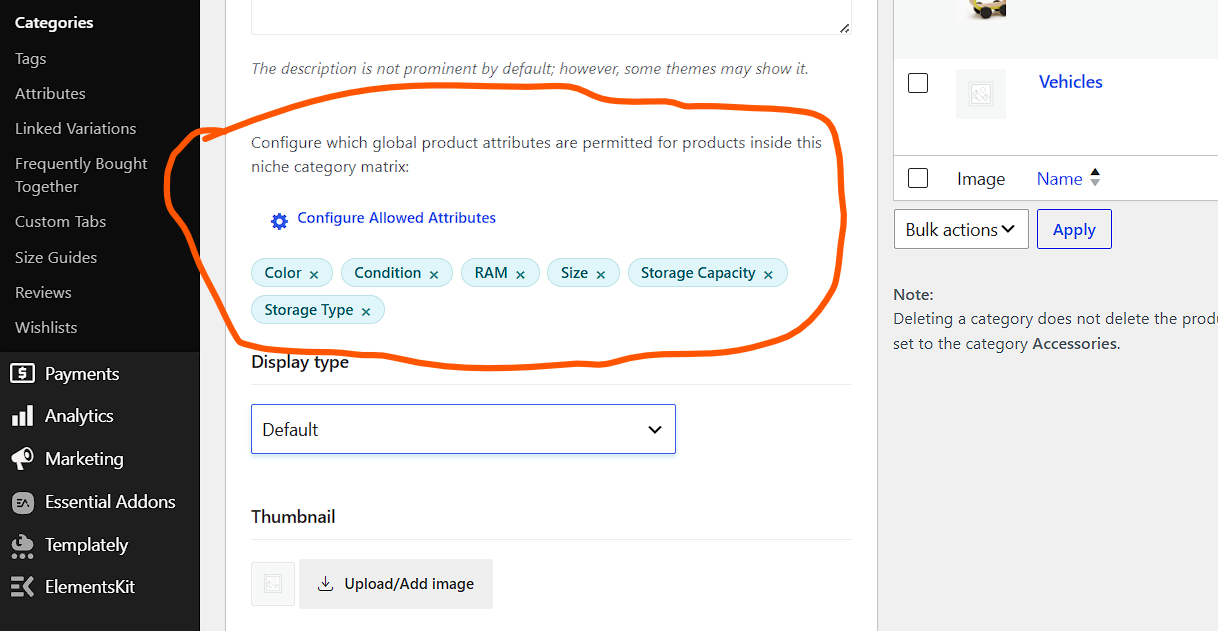
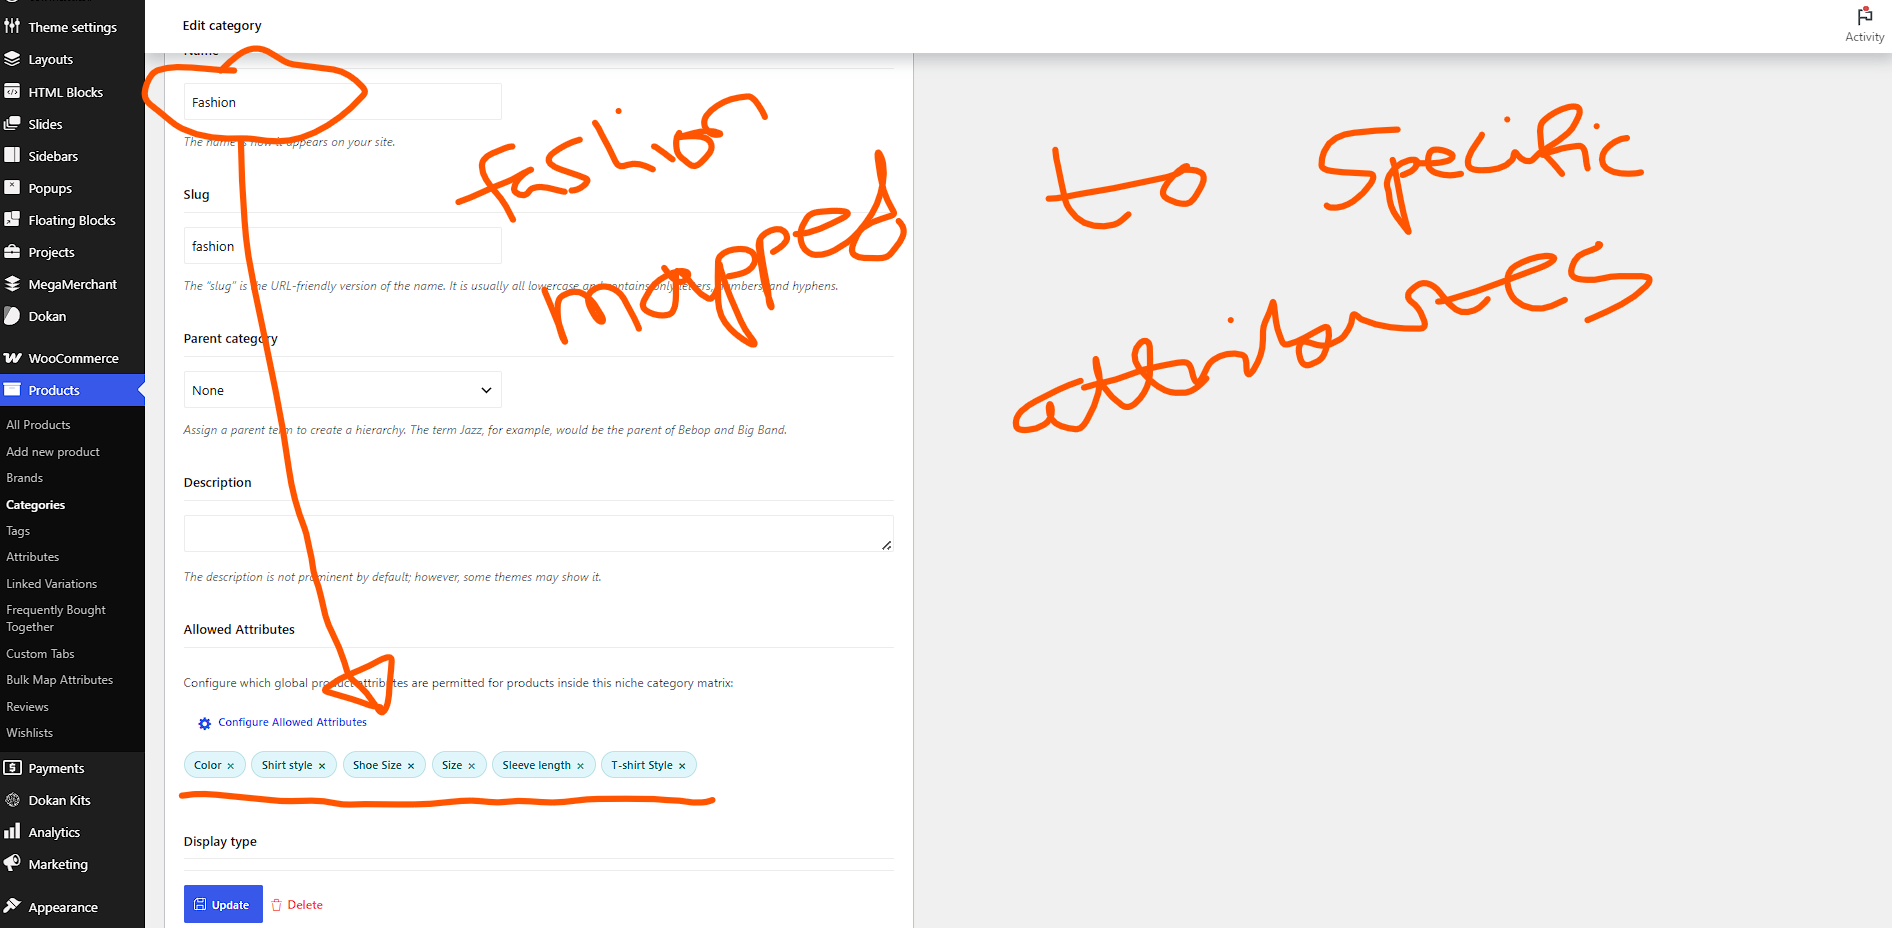
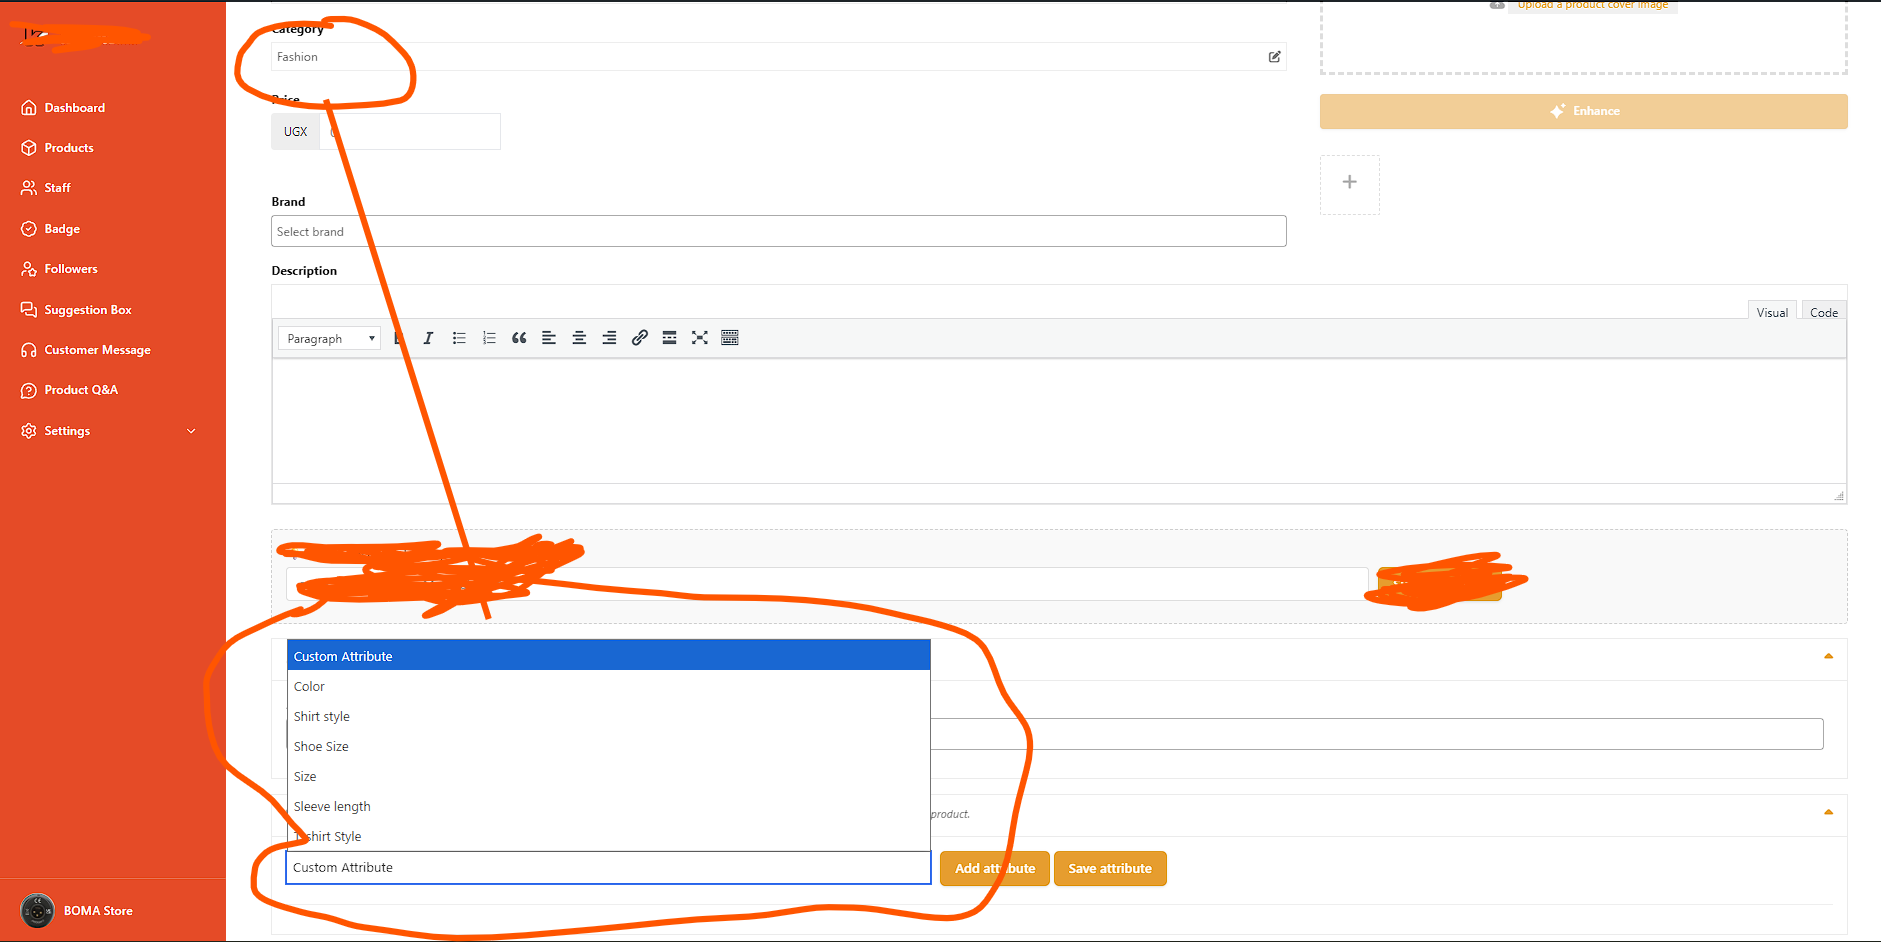
Step 2: Configuring Allowed Attributes Per Category
This is where the magic happens. The plugin extends standard WooCommerce product categories with a new configuration panel.
Accessing Category Settings
-
Go to Products → Categories in your WordPress admin
-
Either Add New Category or Edit an existing one
-
Scroll down past the standard Name, Slug, Parent, and Description fields
Using the Attribute Selector Modal
When you click “Configure Attributes”, a sleek modal window opens. This interface is designed for efficiency:
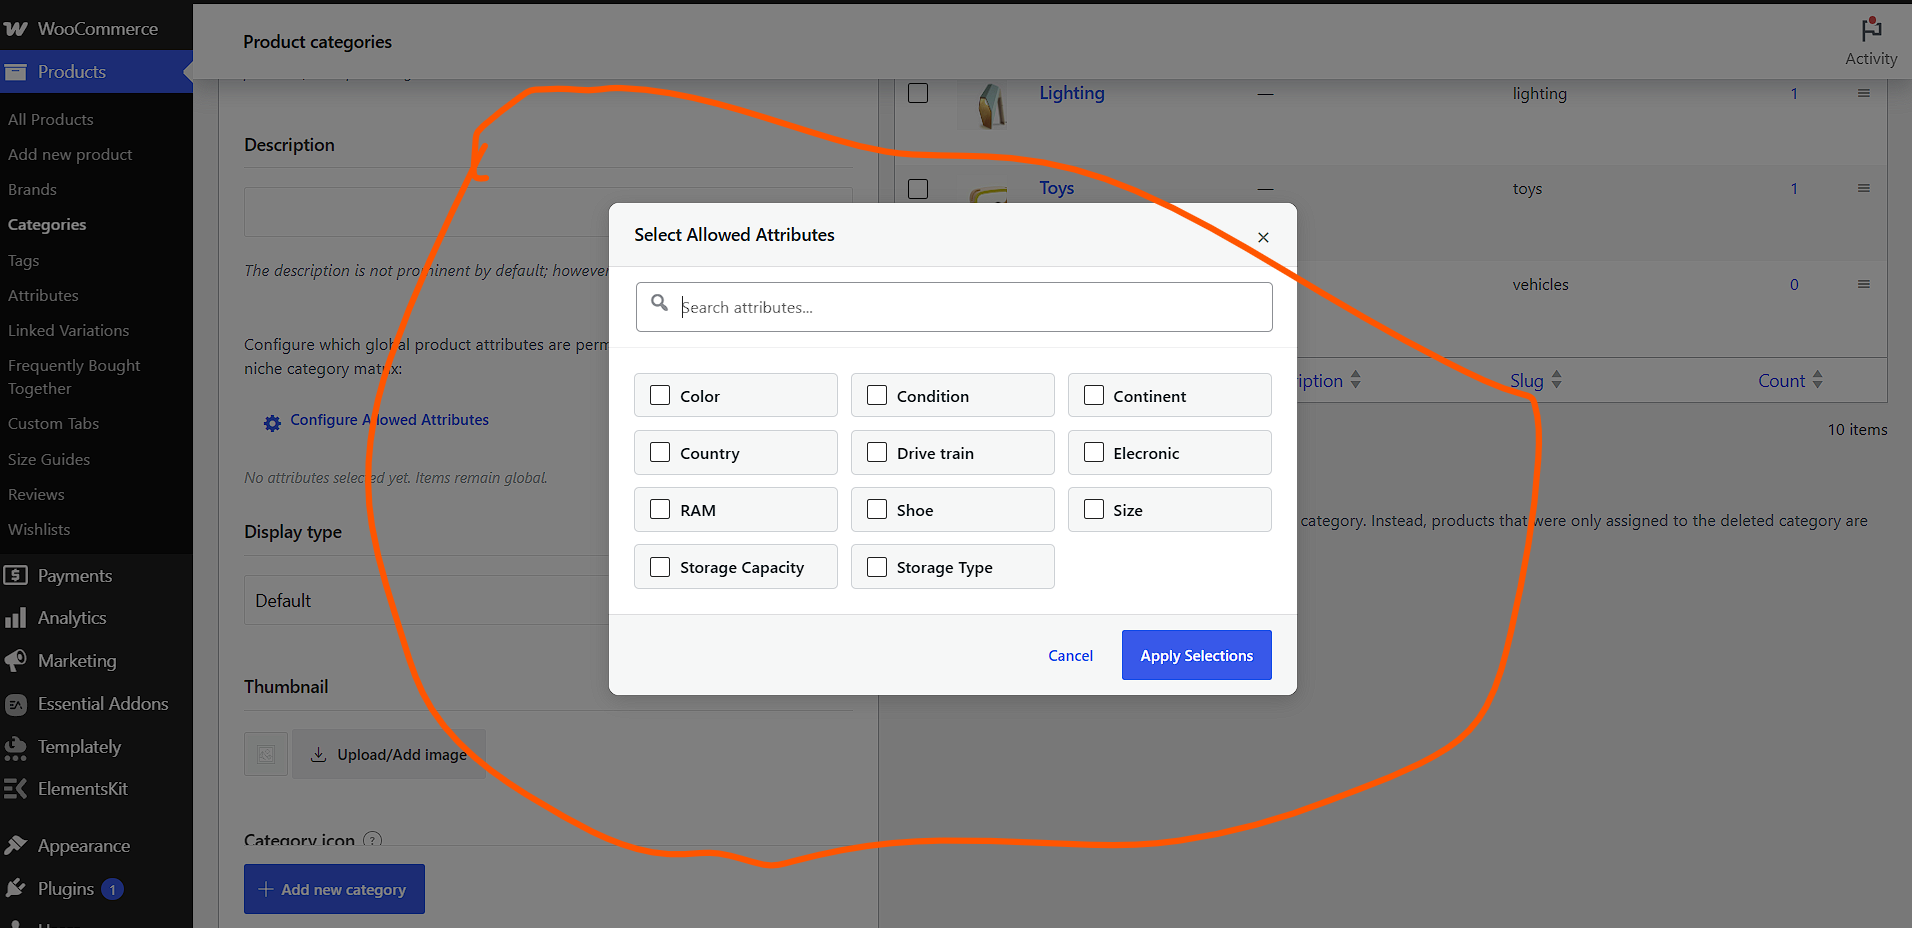
How to Select Attributes
-
Browse or Search: Use the search bar to quickly find attributes. Type “col” and “Color” filters instantly.
-
Check the Boxes: Click any attribute tile to select it. Selected tiles get a blue highlight and checkmark.
-
Review Chips: After saving, selected attributes appear as removable “chips” below the button—visual confirmation of what’s configured.
-
Remove Unwanted: Click the × on any chip to instantly deselect that attribute without reopening the modal.
Step 3: The Vendor Experience (What Your Sellers See)
After configuration, log into a vendor dashboard to see the transformation.
Before: The Chaos
Without this plugin, when a vendor creates a product and selects a category, they see every single global attribute in WooCommerce. That might include:
-
Color
-
Size
-
Material
-
Battery Life
-
Screen Resolution
-
Storage Capacity
-
Processor Type
-
Warranty Period
- ….
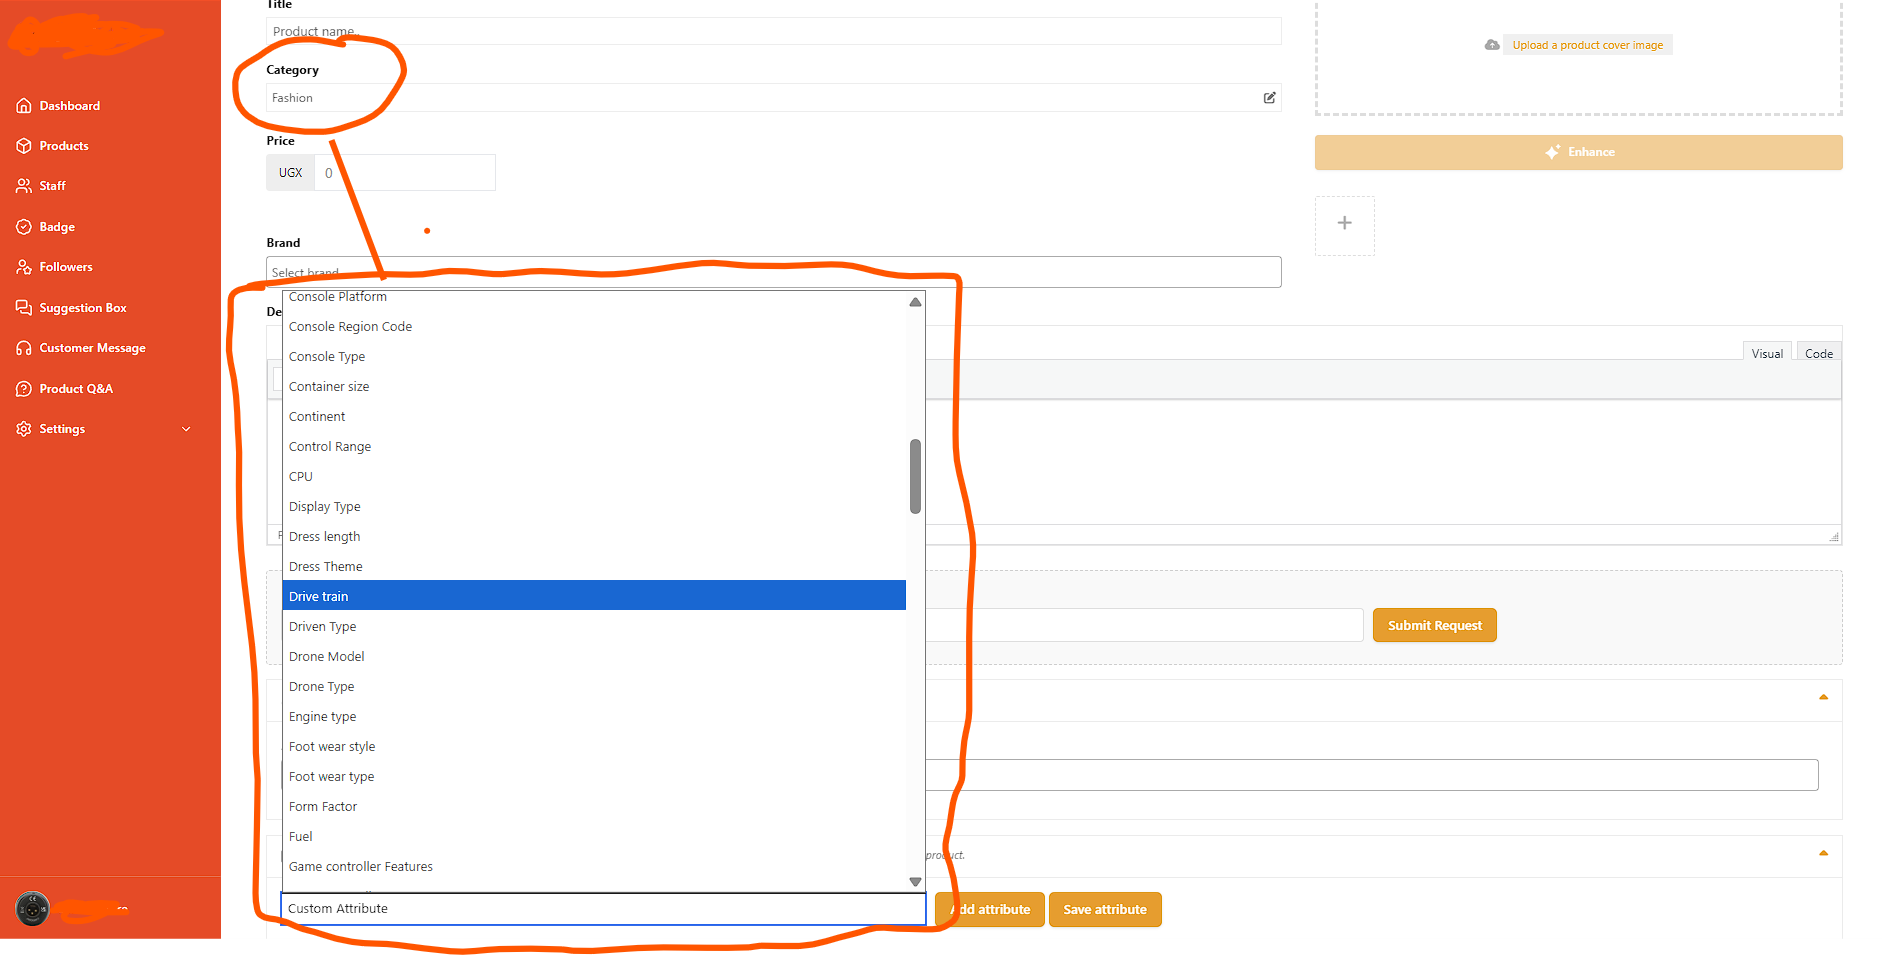
After: The Clarity
With the plugin active, the vendor selects “Men’s T-Shirts” and the attribute dropdown instantly shrinks to:
-
Color
-
Size
-
Material
Real-Time Behavior
The plugin uses a sophisticated JavaScript observer that:
-
Watches for category selection changes in the Dokan category input holder
-
Builds a map of which categories allow which attributes (passed via
window.X7M) -
Filters the attribute dropdown instantly when categories change
-
Removes already-added attribute rows that become invalid after a category switch
This means if a vendor accidentally adds “Battery Life” to a T-Shirt, then changes the category to “T-Shirts” (which doesn’t allow that attribute), the invalid attribute row is automatically removed from the DOM.
Step 4: Frontend Impact and Customer Experience
The plugin isn’t just about vendor convenience—it directly improves the shopping experience.
Clean Category Page Filters
On frontend product category archives, WooCommerce typically shows all attribute filters in layered navigation widgets. With this plugin:
-
Visiting
/product-category/mens-t-shirts/shows filters for Color, Size, Material -
Visiting
/product-category/smartphones/shows filters for Storage, Screen Size, Color

SEO Benefits of Clean Attributes
Search engines crawl your filter URLs. When you eliminate irrelevant attribute combinations:
-
You reduce thin content pages that have zero products
-
You improve crawl budget efficiency
-
You strengthen topical authority by keeping category-attribute relationships logical
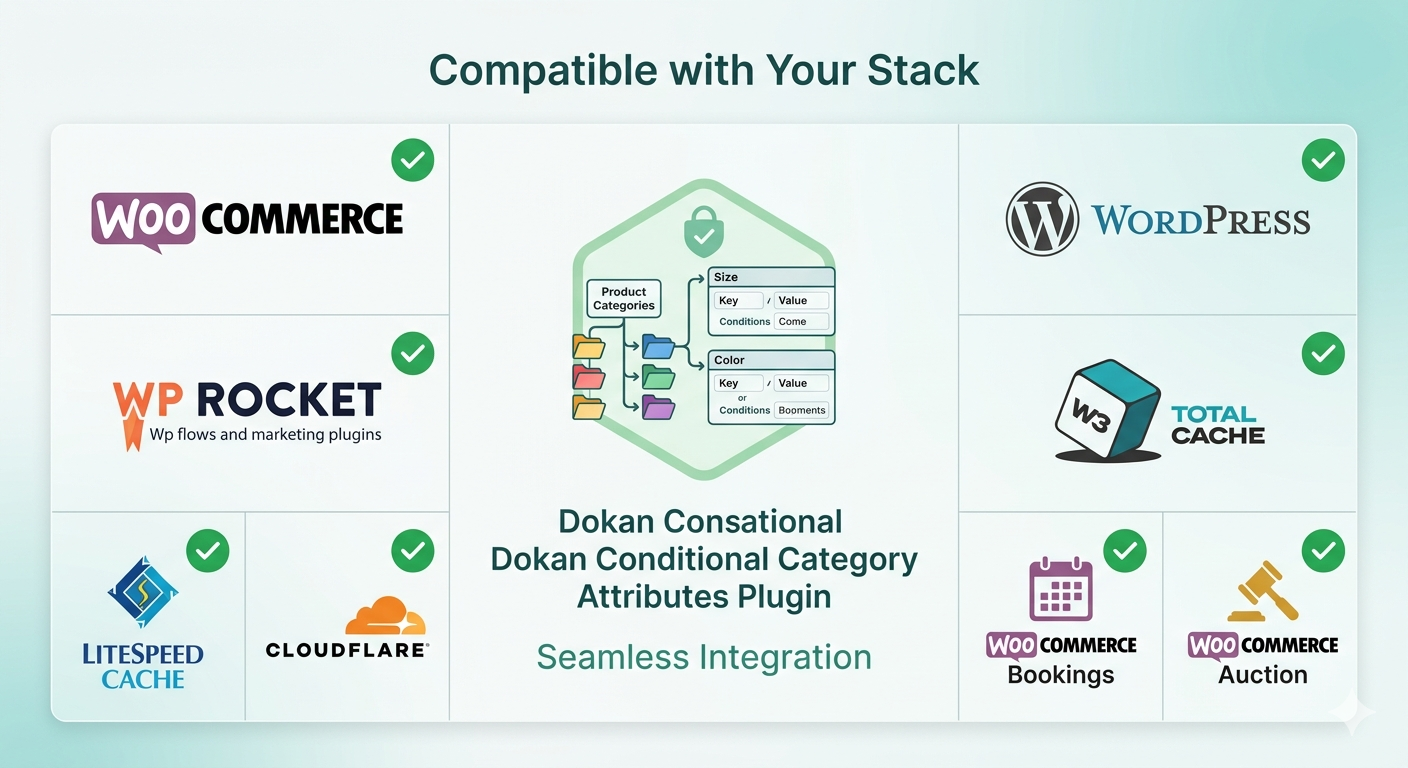
Compatibility and Integration
Before investing in any plugin, you need to know it will play nicely with your existing stack.
Dokan Multi-Vendor
The plugin is built specifically for Dokan and tested against both the free and pro versions. It supports:
-
Dokan Lite frontend dashboard
-
Dokan Pro advanced product editing
-
Vendor subscription products
-
Dokan Bookings and Auction integrations (attributes are filtered appropriately)
WooCommerce
Fully compatible with:
-
WooCommerce 7.x and 8.x
-
WooCommerce Blocks and Storefront themes
-
Custom product types (when they use standard attribute systems)
-
WooCommerce REST API (attribute filtering applies to products created via API if they trigger standard save hooks)
Themes and Page Builders
The frontend filter functionality works with any theme that uses standard WooCommerce layered navigation widgets. On the vendor dashboard, the plugin targets Dokan’s specific HTML structure, so it remains stable regardless of the frontend theme.
Caching Plugins
Because the plugin uses standard WordPress and WooCommerce APIs, it is compatible with:
-
WP Rocket
-
W3 Total Cache
-
LiteSpeed Cache
-
Cloudflare page caching (for frontend filters)
Step 5: Best Practices for Marketplace Admins
Tip 1: Plan Your Attribute Architecture First
Before touching the plugin, map out your category tree and desired attributes:
plain
Electronics
├── Smartphones → [Color, Storage, Screen Size, Condition]
├── Laptops → [Color, RAM, Storage, Processor, Condition]
└── Accessories → [Color, Compatibility, Length/Size]
Tip 2: Use Parent Categories Strategically
Configure common attributes at the highest possible parent level. Don’t manually set “Color” for every single child category if they all need it. Set it once at the parent and let inheritance handle the rest.
Tip 3: Train Your Vendors
Create a simple vendor onboarding document explaining that attributes are automatically filtered. This reduces support tickets asking “Why can’t I see the XYZ attribute?”

Tip 4: Monitor License Expiry
The plugin shows renewal warnings 30 days before expiry. Don’t ignore these—if the license expires, validation fails and attribute filtering stops working, reverting your marketplace to the chaotic default state.
Conclusion: From Chaos to Controlled Commerce
The Dokan Conditional Category Attributes plugin transforms multivendor marketplaces from messy, inconsistent product catalogs into streamlined, professional shopping destinations. By connecting categories to attributes at the architectural level, you save vendor time, improve data quality, and create better customer experiences.
